Fees Collection
Set up school fees, bill whole classes or individual students, create parent fee notices, record payments, issue receipts and monitor balances, arrears, advances and expected collections.
What is under Fees Collection?
The Fees Collection sidebar contains setup, billing, payment and reporting tools. Use the links below to jump to the related section of this guide.
Before billing: choose the right method
| Situation | Best JestEdu tool | Example |
|---|---|---|
| Most students in selected classes pay the same bill | Quick Fees | BASIC 1–3 all pay Tuition ₵1,200 + PTA ₵100. |
| Classes have different amounts | Quick Fees → Different Amount Per Class | BASIC 1 Tuition ₵1,200; BASIC 2 Tuition ₵1,300. |
| Students in the same class have different bills | Individual Bills | Student A pays ₵900 while Student B pays ₵1,150. |
| You only need a notice/flyer to send parents | Fee Notices Bill | 1st Term 2026/2027 fee breakdown PDF. |
| You prefer building Groups, Types and Masters manually | Fees Group → Fees Type → Fees Master | Advanced/manual setup. |
Create a fee notice for parents
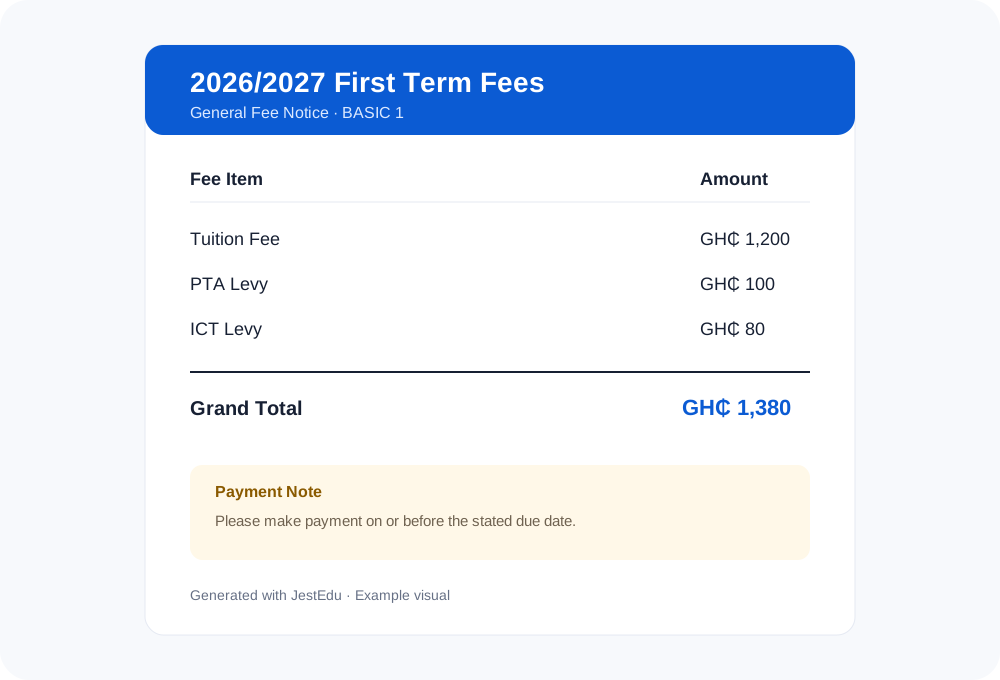
Go to Fees Collection → Fee Notices Bill. This is useful when you want a clean fee breakdown that can be printed, downloaded as PDF or shared with parents.
Select Notice Type
Choose General Notice for a school/class/level fee breakdown, or Student Bill for one student's itemized bill and Grand Total Due.
Enter notice details
Add the Notice Title, Billing Period/Term, Currency Symbol and optional Accent Color.
Add fee groups and items
For a General Notice, a group can be a class or level such as KG 1 or Upper Primary. Add each Fee Item and Amount. JestEdu calculates the subtotal.
Add policy notes and save
Add optional payment notes, then use Save, Save & Download PDF, or Save & Preview / Print.
Quick Fees: fastest way to bill students
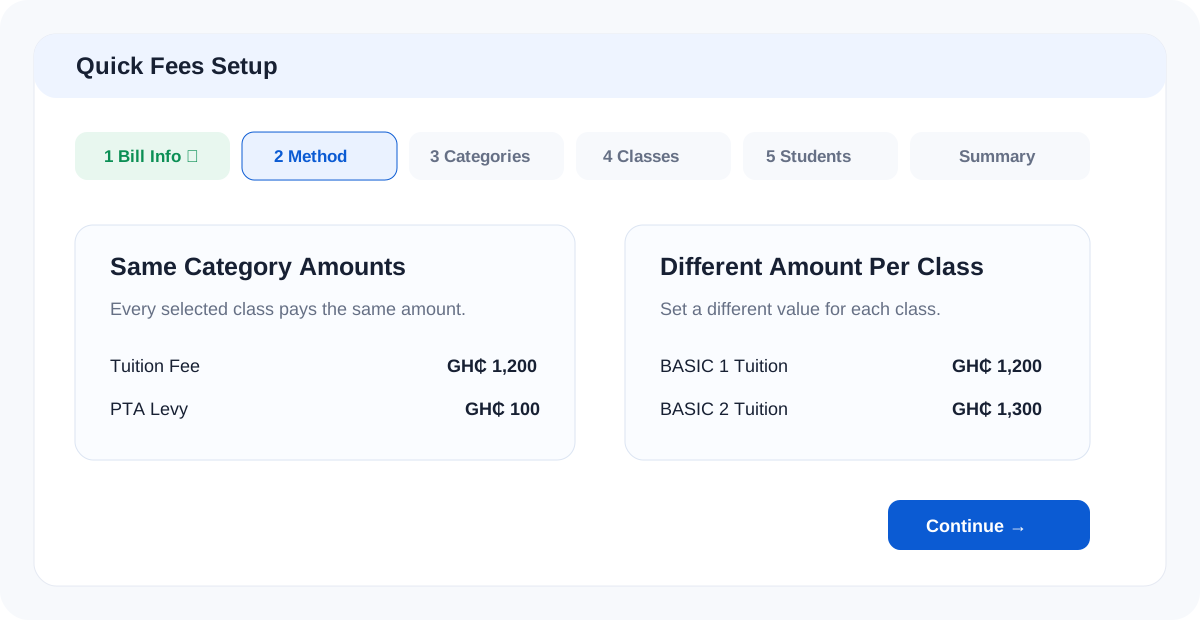
Go to Fees Collection → Quick Fees. The wizard has six stages: Bill Info → Method → Categories → Classes → Students → Summary.
Step 1 — Bill Information
Enter a clear Bill Name, Billing Date, Due Date and Description. Example: 2026/2027 1st Term Bill.
Step 2 — Choose Billing Method
Use Same Category Amounts when selected classes pay the same amounts. Use Different Amount Per Class when amounts vary by class.
Step 3 — Add Fee Categories
Add every component separately—such as Tuition Fee, PTA Levy, ICT Levy and Examination Fee. Each category becomes its own Fees Type so receipts and balances can show each charge clearly.
Step 4 — Select Classes and Sections
Select the classes to bill. Leaving section boxes unchecked bills every active student in the class. Tick specific sections only when the bill should apply to those sections alone.
Step 5 — Choose Students to Bill
| Option | What it does |
|---|---|
| Bill All Students | Every eligible active student in the selected classes/sections receives the bill. |
| Exclude Some Students | Bill everyone except the students you tick. |
| Bill Selected Students Only | Only ticked students receive the bill. |
| Optional Category Exemptions | Exempt selected students from only specific fee categories. |
Step 6 — Review summary and create
Check the billing method, number of categories, selected classes and combined amount per student. Click Create Quick Fees Bill.
Individual Bills: different amount for each student
Use this when students in the same class do not all owe the same amount. Go to Fees Collection → Individual Bills → Bulk Create.
Select Fees Group / Term
Choose the correct billing period so the individual bills remain under the correct term or semester.
Select Class and Section
Choose the class and optionally one section, then click Load Students.
Enter each student's bill
For each learner, enter Payable amount, Discount, Description, Note and one or more Bill Items. You can use Quick Fill Template for common items, then change individual students as needed.
Select and generate bills
Tick students with valid bill amounts. Students with no valid item amount are skipped.
How to record or collect fees
Go to Fees Collection → Collect Fees, search for the student, then click Collect Fees beside the correct student. You will be taken to the student's fee collection page.
Review outstanding fee items
Confirm the fee items, due dates, status, amounts already paid and current balance.
Enter payment
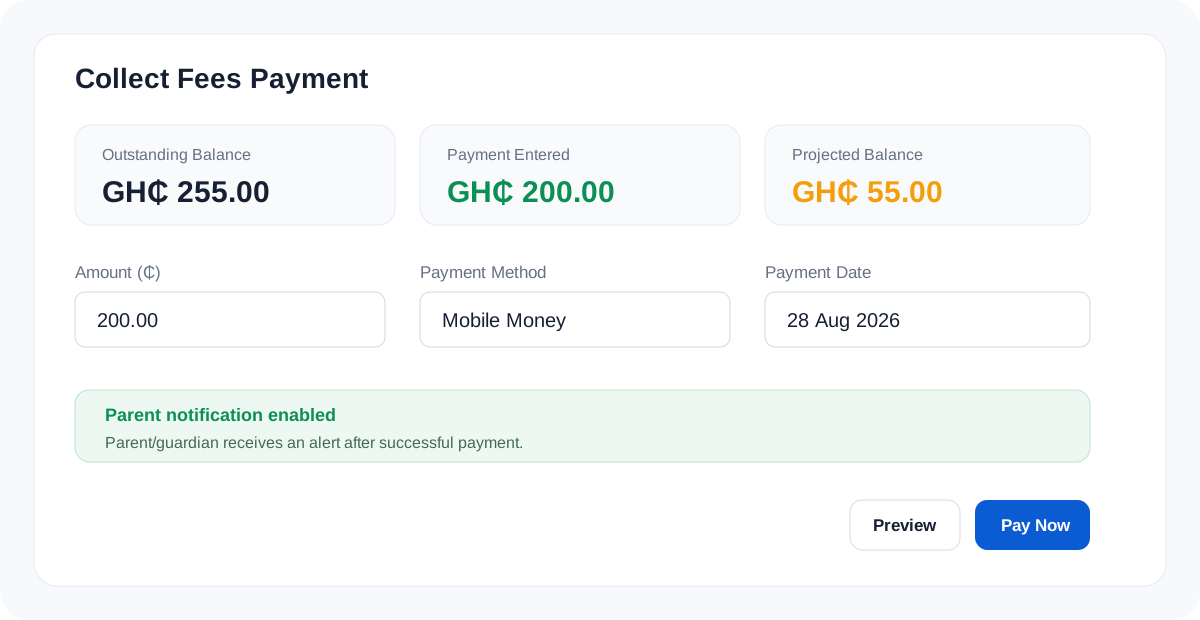
Type the Amount, choose Payment Method—Cash, Bank, Cheque, Mobile Money, USSD, POS or Wallet—select the Payment Date and add an optional Note.
Select the fees to settle
Tick specific outstanding items if needed. If no item is ticked, JestEdu can split the payment across the outstanding fee items. Use Preview Split to check how the payment will be allocated.
Pay and issue receipt
Click Pay Now. After recording the payment, you can print the Official Receipt or use the Smart Receipt option where enabled.
Example of the student's fee ledger
| Fee | Status | Amount | Paid | Balance |
|---|---|---|---|---|
| Projection #2 / Tuition Fee | Unpaid | GH₵ 200 | GH₵ 0 | GH₵ 200 |
| First Term / PTA Levy | Unpaid | GH₵ 10 | GH₵ 0 | GH₵ 10 |
| First Term / ICT Levy | Unpaid | GH₵ 15 | GH₵ 0 | GH₵ 15 |
| 2026/2027 1st Term / PTA Dues | Unpaid | GH₵ 20 | GH₵ 0 | GH₵ 20 |
| Grand Total | GH₵ 245 | GH₵ 0 | GH₵ 245 |
Advance payment and carry forward
If a parent pays more than the selected outstanding fees, enable Save extra amount as advance payment. JestEdu can keep the remaining amount as Fees Carry Forward for the next term. Always review the projected balance before confirming.
Manual fee structure: Fees Group → Fees Type → Fees Master
Schools that do not use Quick Fees can configure fees manually:
Fees Group
Create the billing group or term that will contain related charges.
Fees Type
Create individual fee categories such as Tuition Fee, PTA Levy, ICT Levy or Examination Fee.
Fees Master
Attach fee types to the appropriate classes/sections, amounts and due dates.
Fees Discount
Use Fees Discount to define or apply reductions where applicable. During payment collection, the student's page also provides an Apply Discount action. Confirm the approved discount before saving so balances and reports remain correct.
Fees reports and monitoring
| Menu | Use it for |
|---|---|
| Search Fees Payment | Find previously recorded fee payments. |
| Search Fees Due | Find outstanding amounts and students who still owe fees. |
| Students Not Yet Billed | Identify active students who have not been assigned the expected bill. |
| Bulk Billed Print | Print fee invoices/bills for many students. |
| Daily Collection | Review payments received for a selected day. |
| Expected Fees | Compare the amount the school expects to collect against collections/balances. |
| Arrears & Advance Report | Review amounts owed from previous periods and advance balances. |
| Balance Report | Check student fee balances. |
| Fees Income Report | Review fee income. |
| Audit Trail | Review user activity for accountability and investigation. |
Other Fees Collection tools
Fees Carry Forward transfers eligible balances into a later period. Bank Payment handles bank-payment-slip workflows. Bill Extras is used for extra bill items outside the standard structure. Use the school’s approved finance process when working with these tools.
Common questions
Should I use Quick Fees or Individual Bills?
Use Quick Fees when a class or set of classes follows a common fee structure. Use Individual Bills when particular students need different amounts or itemized arrangements.
I created a bill but some students are missing.
Check the selected class/section, whether the student is active, and Students Not Yet Billed. If Quick Fees was configured to exclude students or bill selected students only, review that selection as well.
A parent paid more than the outstanding amount.
Use Save extra amount as advance payment so the remaining amount is held for future fees instead of being lost from the student's balance history.
How do I confirm what was collected today?
Open Daily Collection. For a broader financial check, compare it with Search Fees Payment, Balance Report and Fees Income Report.
How do I send parents the fee structure before payment?
Create a Fee Notice, then Save & Download PDF or Preview/Print and share the resulting notice with parents.